What actions and data required to complete this screen.
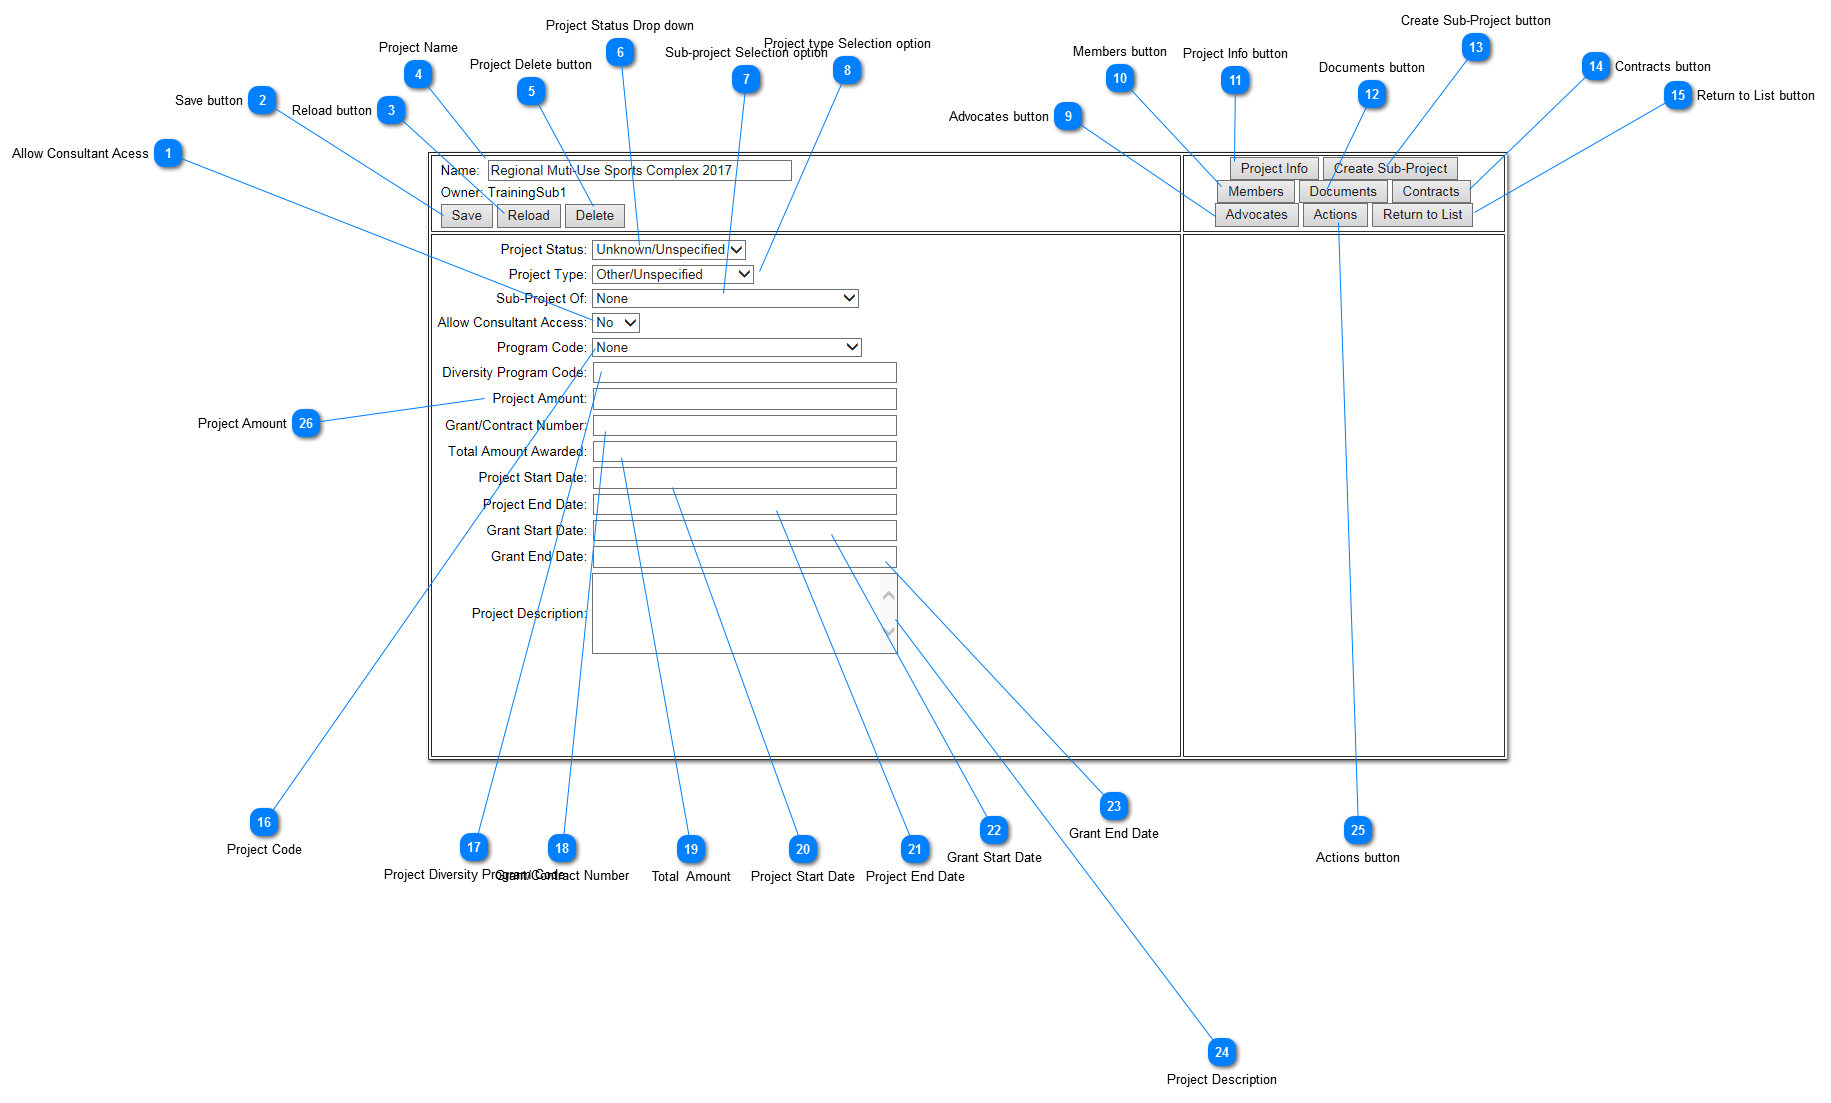
Allow Consultant Acess
Allow Consultant Access field is used to grant consultants access to certain part of the project. The constultant can review project reports and cannot modify it.
The advocates button is used to establish assist agencies at the project level. This function can be performed at the organizational level. When established at this level, all subsequent project would inherent the settings, unless those with project level setup.
Total Amount Awarded is an optional data field. When "Project Amount" is documented, the field provide value of awarded contracts/subcontracts provide information, by simple subtraction, the outstanding contract/subcontract value.
Project Amount is an optional data field. The total project value may be entered here. The informational value cannot be overstated if it a multi-layered project (projects with sub-projects).